1 Introduction
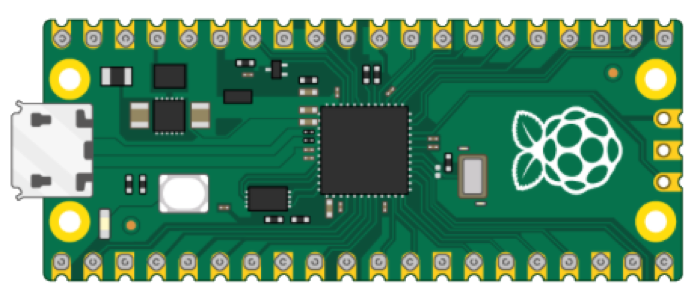
In this Tutorial we will use Raspberry Pi Pico and a Thermistor Temperature Sensor. Raspberry Pi Pico is a microcontroller board developed by the Raspberry Pi Foundation. Raspberry Pi Pico has similar features as Arduino devices. Raspberry Pi Pico is typically used for Electronics projects, IoT Applications, etc.
Raspberry Pi Pico and Thermistor Temperature Sensor (YouTube) + PowerPoint (PDF)
What do you need?
- Raspberry Pi Pico
- A Micro-USB cable
- A PC with Thonny Python Editor (or another Python Editor)
- Breadboard
- Electronics Components like LED, Resistors, Jumper wires, etc.
- 10K Thermistor Temperature Sensor
- 10K Ohm Resistor
A Thermistor Temperature Sensor is a small and cheap temperature sensor that you can buy everywhere, like Sparkfun, Elfa Distrelec, etc. We will use a 10K NTC Thermistor in this tutorial.

1.1 Raspberry Pi Pico
Raspberry Pi Pico is a “downscaled” version of the original Raspberry Pi and is more comparable with Arduino compared to the original Raspberry Pi. You also need to use a downscaled version of Python, called MicroPython.

Haven't used Raspberry Pi Pico before? Getting Started with Raspberry Pi Pico
1.2 Python
As mentioned, Raspberry Pi Pico uses a downscaled version of Python, called MicroPython, but most of the original Python will work.
Here you will find more Python Resources.
2 Thermistor
A thermistor is an electronic component that changes resistance to temperature - so-called Resistance Temperature Detectors (RTD).
A Thermistor is a resistor that changes its resistance with temperature. In temperature measurements we typically use a NTC (Negative Temperature Coefficient) Thermistor. For NTC thermistors we have that the resistance gets lower when the temperature gets higher.
We will use a 10K NTC Thermistor in this tutorial. A 10K Thermistor has a resistant R = 10K @ 25°C.
Steinhart-Hart equation
There is a non-linear relationship between resistance and excitement. To find the temperature we can use the Steinhart-Hart equation:

where A = 0.001129148, B = 0.000234125 and C = 8.76741E−08.
Tk is the Temperature in degrees Kelvin and R is the resistance.
3 Voltage Divider
When using Raspberry Pi Pico (or similar devices) we are only able to read a voltage level using the built-in Analog to Digital Converter (ADC). This means we need to create and use a so-called Voltage Divider in order to be able to read the voltage level and then we can calculate the Resistance R that flows through the Thermistor.
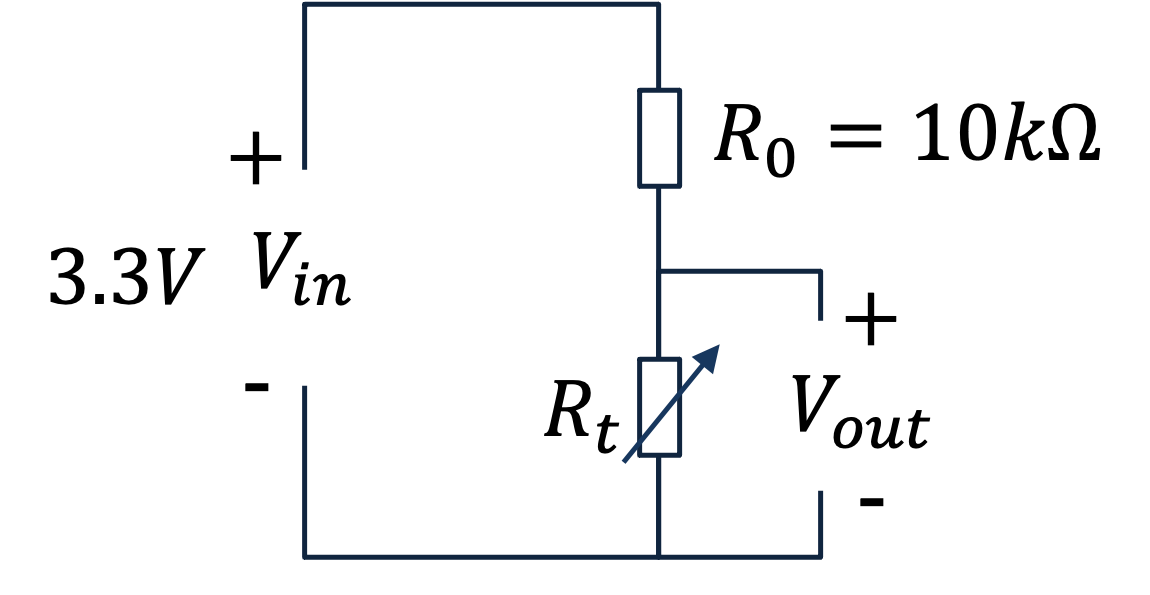
Below you see a Voltage Divider for our system:

In addition to the 10K Thermistor where the resistance changes with the temperature we use a 10K Ohm Resistor.
Below you see a general Voltage Divider:

The general Voltage Divider Equation is as follows:

Vout is the voltage level we read using the ADC on the Raspberry Pi Pico.
We reformlate in order to find the Resistance (Rt) flowing through the Thermistor:

The value of the resistor (Ro) should be roughly equal to the resistance of your thermistor. The accuracy will be poorer if the value of the known resistor (Ro) is much smaller or larger than the resistance of the unknown resistor Rt (Thermistor).
4 MicroPython Examples
We wire the circuit on the Breadboard and connect it to the Raspberry Pi Pico device.
Wiring:

In the MicroPython code we need to do the following steps:
- We measure Vout using the ADC on Raspberry Pi Pico
- We calculate Rt using the Voltagee Divider Equation
- Then we use Steinhart-Hart equation for finding the Temperature
- Finally we convert from degrees Kelvin to Celsius
These steps are can be illustrated with a so-called "Pseudo Code":

MicroPython Code Eeample for reading and calculation the Temperature Value from a Thermistor:
from machine import ADC
from time import sleep
import math

adcpin = 26
thermistor = ADC(adcpin)

# Voltage Divider
Vin = 3.3
Ro = 10000  # 10k Resistor

# Steinhart Constants
A = 0.001129148
B = 0.000234125
C = 0.0000000876741

while True:
    # Get Voltage value from ADC
    adc = thermistor.read_u16()
    Vout = (3.3/65535)*adc

    # Calculate Resistance
    Rt = (Vout * Ro) / (Vin - Vout)
    # Rt = 10000  # Used for Testing. Setting Rt=10k should give TempC=25

    # Steinhart - Hart Equation
    TempK = 1 / (A + (B * math.log(Rt)) + C * math.pow(math.log(Rt), 3))

    # Convert from Kelvin to Celsius
    TempC = TempK - 273.15

    print(round(TempC, 1))
    sleep(5)
Improved example:
Here, we have made a separate Python function for the thermistor logic. This makes it easy to use this part in several Applications.
thermistor.py:
import math

def thermistorTemp(Vout):

    # Voltage Divider
    Vin = 3.3
    Ro = 10000  # 10k Resistor

    # Steinhart Constants
    A = 0.001129148
    B = 0.000234125
    C = 0.0000000876741

    # Calculate Resistance
    Rt = (Vout * Ro) / (Vin - Vout)

    # Steinhart - Hart Equation
    TempK = 1 / (A + (B * math.log(Rt)) + C * math.pow(math.log(Rt), 3))

    # Convert from Kelvin to Celsius
    TempC = TempK - 273.15

    return TempC
Main Application:
from machine import ADC
from time import sleep
import thermistor

adcpin = 26
sensor = ADC(adcpin)

while True:
    adc = sensor.read_u16()
    Vout = (3.3/65535)*adc

    TempC = thermistor.thermistorTemp(Vout)

    print(round(TempC, 1))

    sleep(5)
5 Final Application
In the final example the code has been put into a separate Class and a separate Python Module:
Python Module (Filename: TemperatureSensors.py):
class Thermistor:
    def __init__(self, pin):
        self.thermistor = ADC(pin)

    def ReadTemperature(self):
        # Get Voltage value from ADC
        adc_value = self.thermistor.read_u16()
        Vout = (3.3/65535)*adc_value

        # Voltage Divider
        Vin = 3.3
        Ro = 10000  # 10k Resistor

        # Steinhart Constants
        A = 0.001129148
        B = 0.000234125
        C = 0.0000000876741

        # Calculate Resistance
        Rt = (Vout * Ro) / (Vin - Vout)

        # Steinhart - Hart Equation
        TempK = 1 / (A + (B * math.log(Rt)) + C * math.pow(math.log(Rt), 3))

        # Convert from Kelvin to Celsius
        TempC = TempK - 273.15

        return round(TempC,2)
Main Program:
from TemperatureSensors import Thermistor
from time import sleep

adcpin = 26
thermistor = Thermistor(adcpin)

while True:
    TempC = thermistor.ReadTemperature()
    print(TempC)
    sleep(5)
More information/resources regarding Functions, Classes and Modules in Python:
Create Functions with Python (YouTube) + PowerPoint (PDF)
Create Classes in Python (YouTube) + PowerPoint (PDF)
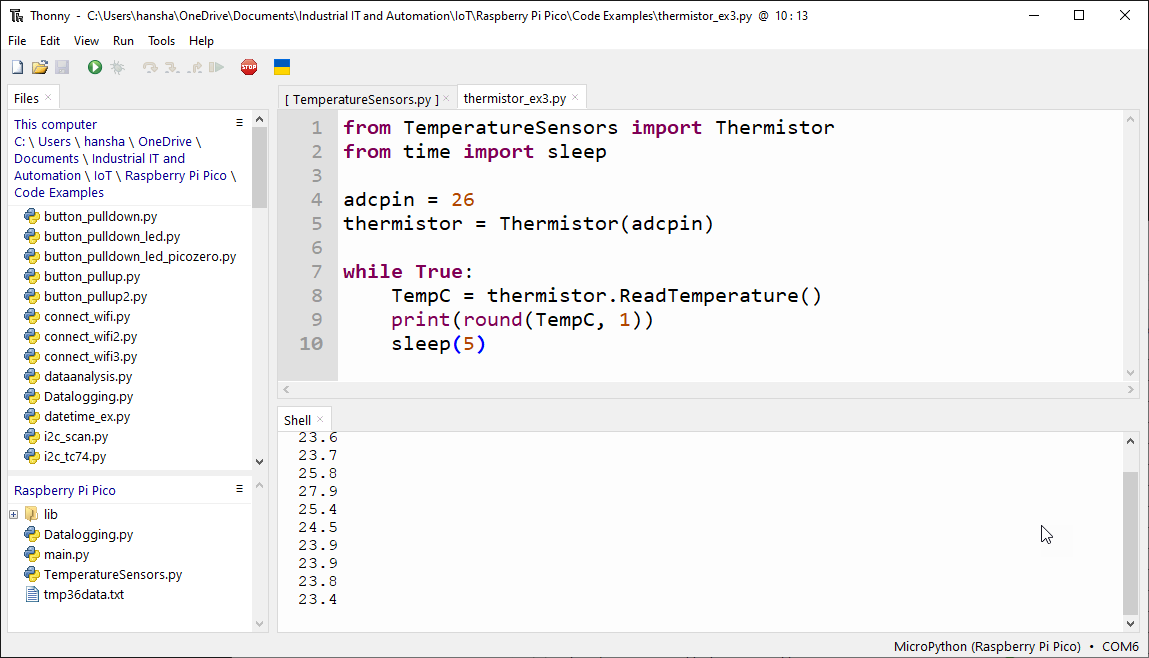
Final Results:
Here you see the final results in the Thonny Python Editor:

For more Raspberry Pi Pico Resources, Tutorials, Examples and Videos see the main Raspberry Pi Pico page.
Additional Resources
Below you will find more interesting and relevant resources
IoT
Internet of Things
Raspberry Pi
Raspberry Pi resouces
